[인스타클론코딩] [App].12- 인스타그램 검색화면 ReactNative로 만들기
by 한만섭
검색화면 구성하기
1. 헤더에 Search Input 넣기
header에 SearchInput 컴포넌트를 넣는 방법은 여러가지가 있습니다.
-
stackNavigation의HeaderTitle을SearchInput컴포넌트로 넣기위 방법을 사용했더니 header에 input을 넣는 것 까지는 했지만 value, onChange, onSubmit과 같은 Prop에 대한 해결을 하기 어려웠습니다.
navigationOptions: { tabBarIcon: ({ focused }) => ( <NavIcon focused={focused} name={Platform.OS === "ios" ? "ios-home" : "md-home"} /> ) } -
Search screen을
class Component로 바꾸고static으로navigationOptions넣기
1-1. function 컴포넌트 class 컴포넌트로 바꾸기
class Search extends Component {
  render() {
    return (
      <View>
        <Text>Search</Text>
      </View>
    );
  }
}
위처럼 class형태로 컴포넌트를 바꿔줍니다.
1-2. navigationOptions 넣어주기
class Search extends Component {
  static navigationOptions = () => ({
    headerTitle: () => (
      <SearchInput
        value={""}
        onChange={() => null}
        onSubmit={() => null}
        placeholder={"Search"}
      />
    )
  });

  render() {
    return (
      <View>
        <Text>Search</Text>
      </View>
    );
  }
}

export default Search;
위처럼 Search컴포넌트에 static 으로 navigationOptions를 만들면 Tabnavigation에서 사용할 수 있습니다.
Search: {
      screen: stackFactory(Search, null, { headerLayoutPreset: "center" }),
      navigationOptions: {
        tabBarIcon: ({ focused }) => (
          <NavIcon
            focused={focused}
            name={Platform.OS === "ios" ? "ios-search" : "md-search"}
          />
        )
      }
    },
1-2. SearchInput에 value onChange, onSubmit 넣기

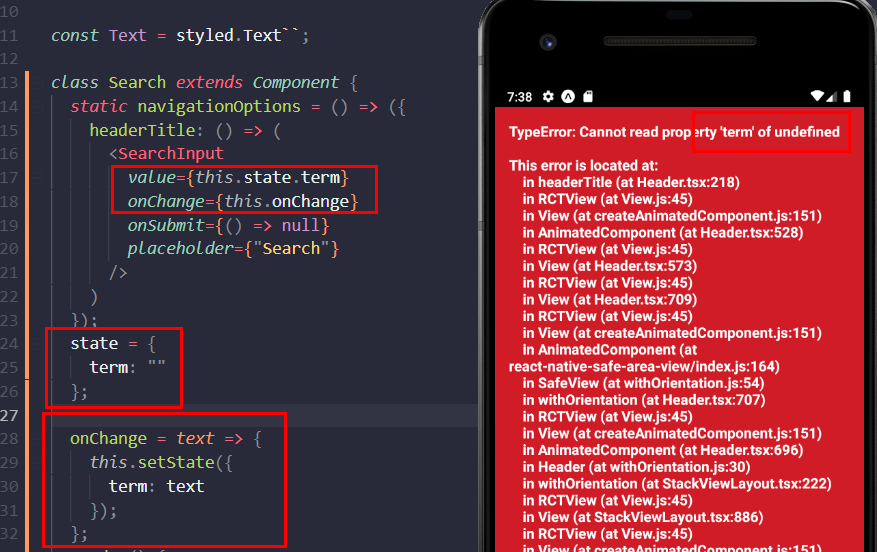
state와 함수를 만들어서 넣어주면 위와 같은 에러가 발생하는데 이 에러가 발생하는 이유는 static이 state가 생성되기 전에 호출이 되기 때문입니다.
이 에러를 해결하기 위해서는 static보다 먼저 호출되는 contructor에 state를 사용하면 해결할 수 있습니다.

위와 같이 사용할 수 있습니다.
constructor
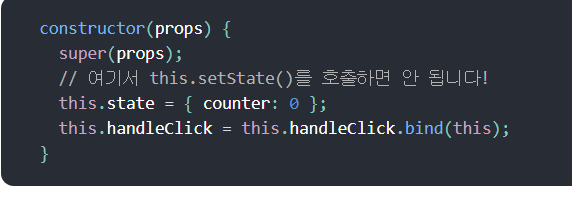
constructor(props) {
    super(props);
    //screen은 navigation을 props로 받음.
    const { navigation } = props;

    this.state = {
      term: ""
    };
    //navigation
    navigation.setParams({
      term: this.state.term,
      onChange: this.onChange,
      onSubmit: this.onSubmit
    });
  }
onChange
onChange = text => {
    this.setState({
      term: text
    });
  };

  onSubmit = () => {
    console.log("submit");
  };
constructor를 사용해 navigation의 Param에 값을 넣어놓고, SearchInput에서는 navigation.getParam을 이용해 prop를 전달해줬습니다.
 static navigationOptions = ({ navigation }) => ({
    headerTitle: (
      <SearchInput
        value={navigation.getParam("term", "")}
        onChange={navigation.getParam("onChange", () => null)}
        onSubmit={navigation.getParam("onSubmit", () => null)}
        placeholder={"Search"}
      />
    )
  });
위 코드처럼 작성하게 되면 동작을 잘 할 것 같았습니다. 하지만 input 값이 변하지 않았습니다. 이유는 SearchInput에서 사용하는 navigation.getParam은 처음에 contructor에서 정해준 ""이기 때문입니다. 그래서 setState를 할 때도 navigation.setParams를 해주어야 합니다.
- 수정 코드
onChange = text => {
    const { navigation } = this.props;
    this.setState({
      term: text
    });
    navigation.setParams({ term: text });
  };
전체 코드
import React, { Component } from "react";
import styled from "styled-components";
import SearchInput from "../components/SearchInput";
const View = styled.View`
  flex: 1;
  justify-content: center;
  align-items: center;
`;

const Text = styled.Text``;

class Search extends Component {
  static navigationOptions = ({ navigation }) => ({
    headerTitle: (
      <SearchInput
        value={navigation.getParam("term", "")}
        onChange={navigation.getParam("onChange", () => null)}
        onSubmit={navigation.getParam("onSubmit", () => null)}
        placeholder={"Search"}
      />
    )
  });

  constructor(props) {
    //constructor가 static 보다 먼저 호출되는 것을 이용해서 contructor에서 navigation에 value, onChange, onSubmit을 넣어주면 됨.
    // screen은 props로 navigation이 전달됨

    super(props);
    const { navigation } = props;

    this.state = {
      term: ""
    };
    navigation.setParams({
      term: this.state.term,
      onChange: this.onChange,
      onSubmit: this.onSubmit
    });
  }

  onChange = text => {
    const { navigation } = this.props;
    this.setState({
      term: text
    });
    navigation.setParams({ term: text });
  };

  onSubmit = () => {
    console.log("submit");
  };
  render() {
    return (
      <View>
        <Text>Search</Text>
      </View>
    );
  }
}

export default Search;
1-3. headerTitle 작성시 주의 사항
  static navigationOptions = ({ navigation }) => ({
    headerTitle: ()=> (
      <SearchInput
        value={navigation.getParam("term", "")}
        onChange={navigation.getParam("onChange", () => null)}
        onSubmit={navigation.getParam("onSubmit", () => null)}
        placeholder={"Search"}
      />
    )
  });
위처럼 headerTitle을 function으로 작성하게 되면 한글자를 작성할 때마다 SearchInput을 사용하기 때문에 키보드가 꺼지게 됩니다.
수정 후
  static navigationOptions = ({ navigation }) => ({
    headerTitle: (
      <SearchInput
        value={navigation.getParam("term", "")}
        onChange={navigation.getParam("onChange", () => null)}
        onSubmit={navigation.getParam("onSubmit", () => null)}
        placeholder={"Search"}
      />
    )
  });
2. 게시물 검색
검색 화면이기 때문에 backend 에 Search에 관련된 Query를 날려야 합니다. apollo-boost의 gql을 사용해서 Query를 작성하고 작성한 Query를 호출해서 검색 결과를 grid형태의 사진으로 보여주려고 합니다.
2-1. Container과 Presenter로 분리
2-2. should refetch 사용하기
useQuery의 skip을 사용해서 원할때 query 요청하기
2-3. layout 구성
2-4.
Subscribe via RSS
