[redux] WebPack React Typescript Redux를 이용한 Todo만들기
by 한만섭
서론
본론
1. 프로젝트 설정
프로젝트 생성
mkdir redux-todo
프로젝트로 이동
cd redux-todo
npm 셋팅
npm init -y
dist/index.html
<!DOCTYPE html>
<html lang="en">
  <head>
    <meta charset="UTF-8" />
    <meta name="viewport" content="width=device-width, initial-scale=1.0" />
    <meta http-equiv="X-UA-Compatible" content="ie=edge" />
    <title>Document</title>
  </head>
  <body>
    <div id="root"></div>
    <script src="/bundle.js"></script>
  </body>
</html>
2. webpack 설정
webpack 설치
npm install --save-dev webpack webpack-dev-server webpack-cli
pakage.json 설정
pakage.json
{
  "name": "redux-todo",
  "version": "1.0.0",
  "description": "",
  "main": "index.js",
  "scripts": {
    "start": "webpack-dev-server --config ./webpack.config.js --mode development ",
    "test": "echo \"Error: no test specified\" && exit 1"
  },
  "keywords": [],
  "author": "",
  "license": "ISC",
  "devDependencies": {
    "webpack": "^4.39.3",
    "webpack-cli": "^3.3.7",
    "webpack-dev-server": "^3.8.0"
  }
}
webpack 설정
webpack.config.js
module.exports = {
  entry: ["./src/index.js"],
  output: {
    path: __dirname + "/dist",
    publicPath: "/",
    filename: "bundle.js"
  },
  devServer: {
    contentBase: "./dist"
  }
};
엔트리 코드 작성
./src/index.js
console.log("webpack test");
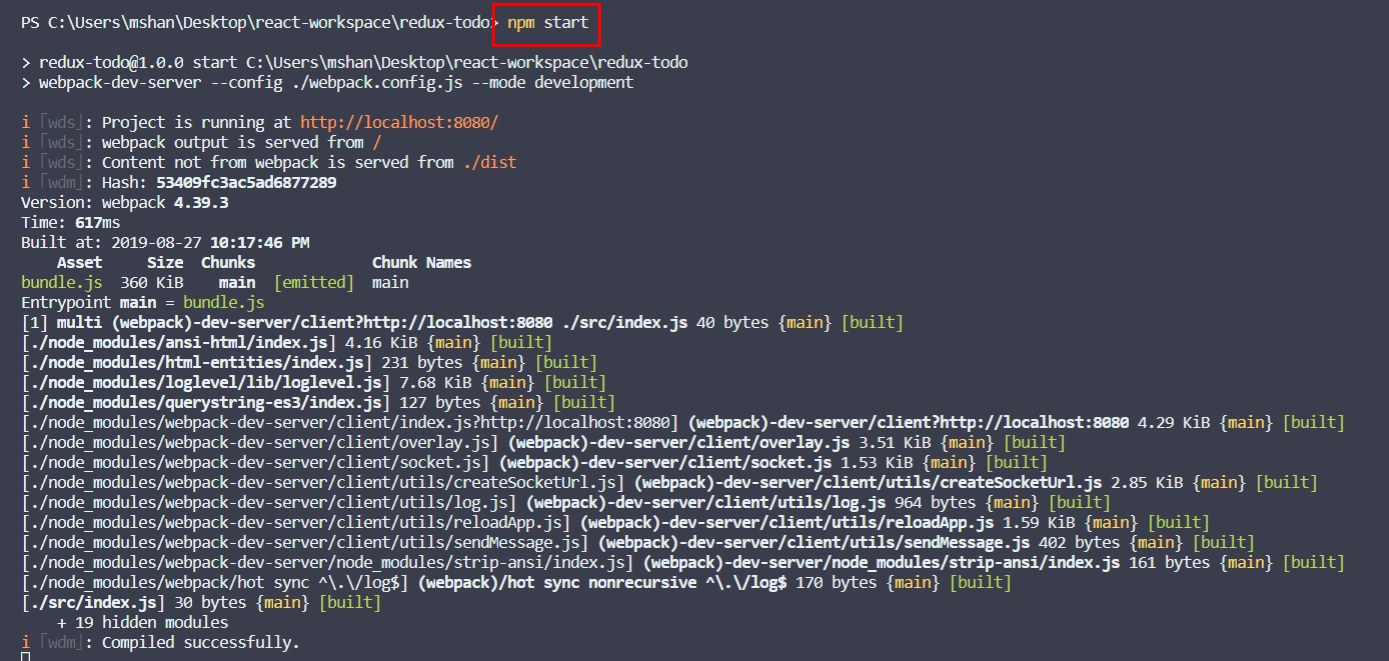
실행


위와 같이 웹팩 셋팅 후 실행 되는 것 확인
3. React 설치
npm i react react-dom
4. Typescript 설치
설치

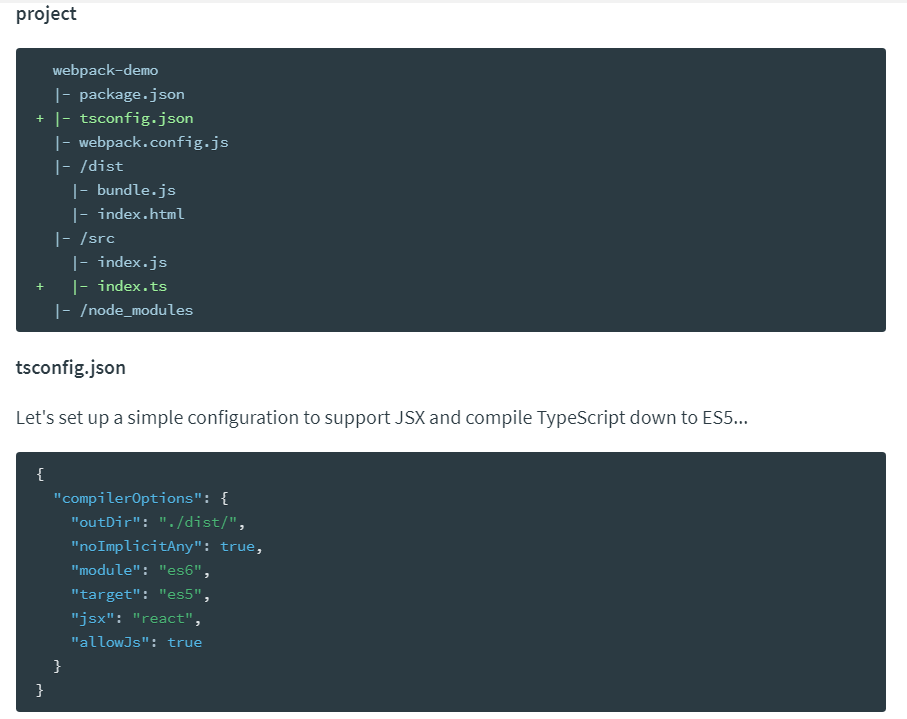
설정

{
  "compilerOptions": {
    "outDir": "./dist/",
    "noImplicitAny": true,
    "module": "es6",
    "target": "es5",
    "jsx": "react",
    "allowJs": true
  }
}
웹팩 설정파일 수정
module 부분과 resolve부분을 추가해줍니다.
module.exports = {
  entry: ["./src/index.tsx"],
  module: {
    rules: [
      {
        test: /\.tsx?$/,
        use: "ts-loader",
        exclude: /node_modules/
      }
    ]
  },
  resolve: {
    extensions: [".tsx", ".ts", ".js"]
  },
  output: {
    path: __dirname + "/dist",
    publicPath: "/",
    filename: "bundle.js"
  },
  devServer: {
    contentBase: "./dist"
  }
};
src/index.tsx
import React from "react";
import ReactDOM from "react-dom";

ReactDOM.render(<div>typescript test</div>, document.getElementById("root"));
typescript 를 사용할 것이기 때문에 코드를 위와 같이 수정

기본적인 문법은 허용한다는 설정을 해야합니다. tsconfig.json을 아래와 같이 수정해줍니다.
tsconfig.json
"allowSyntheticDefaultImports": true추가
{
  "compilerOptions": {
    "outDir": "./dist/",
    "noImplicitAny": true,
    "module": "es6",
    "target": "es5",
    "jsx": "react",
    "allowJs": true,
    "allowSyntheticDefaultImports": true
  }
}
index.tsx
import React from "react";
import ReactDOM from "react-dom";
import App from "./App";

ReactDOM.render(<App></App>, document.getElementById("root"));
App.tsx
import React from "react";

const add = (a, b) => a + b;

export default () => {
  return <div>typescript Test</div>;
};


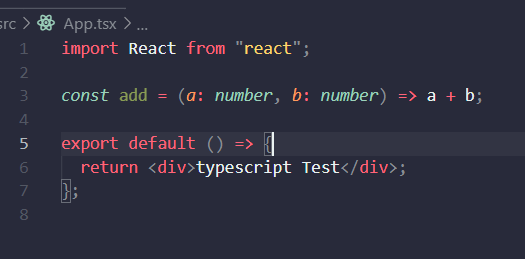
타입이 적용되지 않을 경우 위와 같은 이슈를 띄어주는 것을 보아 typescript가 정상적으로 setting 된 것 같습니다. 타입을 지정해주면 아래와 같이 정상적으로 동작합니다.

ts-loader가 babel-loader의 역할을 해주기 때문에 babel을 일단은 사용하지 않아도 이슈가 없어보임.
5. Redux 설치
_Redux_는 @types버전과 원래버전 둘다 설치를 해야합니다.
- 원래 버전 설치
npm install react-redux redux
- @types 버전 설치
npm install @types/react-redux @types/redux
6. reducer types 정의하기
todo reducer를 만들 경우, 파일 경로는 ./store/todo/에 만들어주면 됩니다.
reducer의 type을 정의 하기위해 types 파일을 만들어줍니다. 여기에는 reducer의 initialState의 type
과 action의 type을 정의합니다.
./store/todo/types.tsx
/*
type을 정의하고 todoAction의 type을 정의하는 곳
*/

export const ADD_TODO = "ADD_TODO";
export const TOGGLE_TODO = "TOGGLE_TODO";
export const DELETE_TODO = "DELETE_TODO";

export interface Todo {
  index: number;
  text: string;
  isCompleted: boolean;
}

export interface TodoState {
  todos: Todo[];
}

interface AddTodoAction {
  type: typeof ADD_TODO;
  text: string;
}

interface ToggleTodoAction {
  type: typeof TOGGLE_TODO;
  index: number;
}

interface DeleteTodoAction {
  type: typeof DELETE_TODO;
  index: number;
}

export type TodoActionTypes =
  | AddTodoAction
  | ToggleTodoAction
  | DeleteTodoAction;
7. Action Creator, Action 만들기
./store/todo/action.tsx
import { ADD_TODO, TOGGLE_TODO, DELETE_TODO } from "./types";

export const AddTodoAction = (text: string) => {
  return {
    tyep: ADD_TODO,
    text
  };
};

export const ToggleTodoAction = (index: number) => {
  return {
    type: TOGGLE_TODO,
    index
  };
};

export const DeleteTodoAction = (index: number) => {
  return {
    type: DELETE_TODO,
    index
  };
};
8. reducer 만들기
reducer를 만들 때는 type들을 지정해줄 것이 많기 때문에 주의해야합니다.
8-1. reducer를 만들 때 주의할 점
- 각 case마다 return 을 해주는 데 그 값은 state를 return 해주는 것 입니다.
- map으로 코드를 작성할 떄는 매번 return을 해줘야 합니다.
./store/todo/reducer.tsx
import {
  TodoState,
  TodoActionTypes,
  ADD_TODO,
  TOGGLE_TODO,
  DELETE_TODO
} from "./types";

const initialState: TodoState = {
  todos: [{ index: 1, text: "할일1", isCompleted: false }]
};

const todoReducer = (state = initialState, action: TodoActionTypes) => {
  switch (action.type) {
    case ADD_TODO: {
      console.log("ADD_TODO");
      return {
        todos: [
          ...state.todos,
          {
            index: state.todos.length + 1,
            text: action.text,
            isCompleted: false
          }
        ]
      };
    }
    case TOGGLE_TODO: {
      console.log("TOGGLE_TODO");
      return {
        todos: state.todos.map(todo => {
          if (todo.index === action.index) {
            todo.isCompleted = !todo.isCompleted;
          }
          return todo;
        })
      };
    }
    case DELETE_TODO: {
      console.log("DELETE_TODO");
      return {
        todos: state.todos.filter(todo => todo.index !== action.index)
      };
    }
    default:
      return state;
  }
};

export default todoReducer;
9. Input, Form 만들기
input의 onChange를 사용하기 위해서는 React.ChangeEvent<HTMLInputElement>를 사용해야합니다.
form의 제출 이벤트는 React.FormEvent를 사용해야합니다.
./Components/TodoInput.tsx
import React, { FunctionComponent, useState, InputHTMLAttributes } from "react";
import { useDispatch } from "react-redux";
import styled from "styled-components";
import { ADD_TODO } from "../store/todo/types";

const Input = styled.input``;

const TodoInput: FunctionComponent = () => {
  const [value, setValue] = useState("");
  const dispatch = useDispatch();
  const onChange = (e: React.ChangeEvent<HTMLInputElement>) => {
    setValue(e.target.value);
  };

  const onSubmit = (e: React.FormEvent) => {
    e.preventDefault();
    setValue("");
    dispatch({ type: ADD_TODO, text: value });
  };

  return (
    <form onSubmit={onSubmit}>
      <Input value={value} onChange={onChange}></Input>
    </form>
  );
};

export default TodoInput;
10. List 만들기
여기서 잘못 작성한 것은 ActionCreator를 사용하지 않고 inline으로 바로 넣은 것에서 문제가 있었습니다.
Components/TodList.tsx
Subscribe via RSS
