[React] react-router-dom 정리
by 한만섭
React-router-dom
리액트 라우터 돔에서는 자주 사용하는 몇가지 컴포넌트가 존재합니다. 그것에 대해 정리해보도록 하겠습니다.
1. Switch
switch가 없을 경우 ./tv/popular링크에 들어가면
Router.js
export default () => (
  <Router>
      <Route path="/" exact component={Home} />
      <Route path="/tv"  component={TV} />
      <Route path="/tv/popular"  component={() => <div>popular</div>} />
      <Route path="/search" component={Search} />
      <Redirect from="*" to="/" />
  </Router>
);

위 데이터가 나온다 .
switch가 있을 경우 ./tv/popular링크에 들어가면
Router.js
export default () => (
  <Router>
    <Switch>
    <Route path="/" exact component={Home} />
    <Route path="/tv" component={TV} />
    <Route path="/tv/popular" component={() => <div>popular</div>} />
    <Route path="/search" component={Search} />
    <Redirect from="*" to="/" />
    </Switch>
  </Router>
);

Tv만 나오는 이유는 switch가 여러개의 router중에서 하나만 고르기 때문이다.
그렇다면 popular를 나오게 하고 싶다면 어떻게 해야할까.
정확한 링크일 때만 보여주는 exact를 사용하면 된다.
Router.js
export default () => (
  <Router>
    <Switch>
      <Route path="/" exact component={Home} />
      <Route path="/tv" exact component={TV} />
      <Route path="/tv/popular" component={() => <div>popular</div>} />
      <Route path="/search" component={Search} />
      <Redirect from="*" to="/" />
    </Switch>
  </Router>
);

Route는 위에서 부터 아래로 먼저 맞는 경로가 있을 경우에 보여주기 때문에
Router내부에 있는 Route의 순서를 신경써서 작성해야겠다.
2. HashRouter
사이트에 #가 붙는 방식의 Router
3. BrowserRouter
기존 사이트처럼 /만 붙는 방식의 Router
4. Redirect
지정한 페이지로 보내버리는 역할을 한다.
Router.js
<Redirect from="*" to="/" />
5. Link
a와는 다르게 새로고침을 하지 않는 방식의 페이지 이동 방법.
Router 설계
1. 모든페이지에 공통으로 들어가는 컴포넌트 설계
react-router-dom을 이용한 설계를 할 때 모든 페이지에서 Header컴포넌트를 사용한다면 아래와 같이 코드를 작성할 수 있습니다.
import React from "react";
import {
  HashRouter as Router,
  Switch,
  Route,
  Redirect
} from "react-router-dom";

(...중략...)

export default () => {
  console.log("test");

  return (
    <>
      <Router>
      	<Header />
        <Switch>
          <Route path="/" exact component={Main}></Route>
          <Route path="/search" exact component={Search}></Route>
          <Route path="/sellcar" exact component={SellCar}></Route>
          <Route path="/buycar/:id" exact component={BuyCar}></Route>
          <Route path="/search/:id" exact component={CarDetail}></Route>
          <Redirect from="*" to="/"></Redirect>
        </Switch>
      </Router>
      <Footer></Footer>
    </>
  );
};
위와 같이 무조건 보여주어야할 Header는 Switch태그 밖에 위치시키면 경로에 상관없이 항상 Header가 보이는 것을 확인할 수 있습니다.
하지만 위와 같은 상황이 아닐 수도 있습니다. 다음은 그런 경우에 대해 정리해보겠습니다.
2. url에 따라 사용하는 컴포넌트가 다를 경우
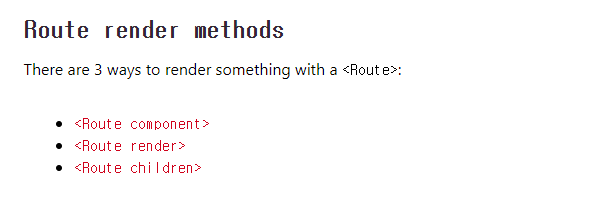
만일 admin페이지에서는 Header를 사용하지 않는다고 가정해보겠습니다. 그러허게 될 경우 switch태그 밖에 있는 Header를 경로가 /admin일 경우에 보이지 않게 해야합니다. 그렇게 하기 위해선 아래와 같이 Route태그의 Render를 이용하시면 됩니다. (Route 태그의 속성 중 무언가를 그리기 위한 메소드는 아래 3개 입니다.)
import React from "react";
import {
  HashRouter as Router,
  Switch,
  Route,
  Redirect
} from "react-router-dom";
export default () => {
  console.log("test");

  return (
    <>
      <Router>
        <Route
          render={({ location }) => {
            if (location.pathname.split("/")[1] !== "admin") {
              return (
                <>
                  <Header />
                  <Sidebar></Sidebar>
                </>
              );
            } else {
              return <AdminHeader></AdminHeader>;
            }
          }}
        ></Route>

        <Switch>
          <Route path="/" exact component={Main}></Route>
          <Route path="/search" exact component={Search}></Route>
          <Route path="/sellcar" exact component={SellCar}></Route>
          <Route path="/buycar/:id" exact component={BuyCar}></Route>
          <Route path="/search/:id" exact component={CarDetail}></Route>
          <Route path="/admin" exact component={AdminMain}></Route>
          <Redirect from="*" to="/"></Redirect>
        </Switch>
      </Router>
      <Footer></Footer>
    </>
  );
};
Route에는 component를 넣어줄 수 도 있지만 Render라는 옵션을 넣어줄 수도 있습니다. Render는 직접 컴포넌트를 넣어줄 수 있습니다.
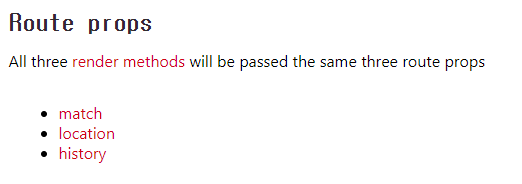
그리고 현재 Route는 props로 match, history, location을 받을 수 있습니다. 이 점을 이용해서 아래와 같이 location의 상태가 admin일 경우 adminHeader를 보여주고 일반 경로일 경우 Header와 Sidebar를 보여주는 설계를 할 수 있었습니다.
 <Route
          render={({ location }) => {
            if (location.pathname.split("/")[1] !== "admin") {
              return (
                <>
                  <Header />
                  <Sidebar></Sidebar>
                </>
              );
            } else {
              return <AdminHeader></AdminHeader>;
            }
          }}
        ></Route>
이렇게 작성하면 꼭 모든 페이지가 공유하지 않는다고 각 페이지 Presenter에 Header를 넣어주는 행동을 하지 않아도 됩니다.
또한, 각 경로마다 어떤 컴포넌트를 사용하는지 더욱 명확히 알 수 있어서 좋은 것 같습니다.
참고사이트 : reacttraning사이트
Subscribe via RSS